Final Major Project:
Interactive Media and Games design 3
Jake Williams
Contextual Research Report
Introduction
This Contextual Research Report will allow me to detail, analyse and research into different practical and planning techniques that I feel I need to improve upon or learn from scratch going into the planning and productions stages of my final major project. I will be looking into an array of different mechanics and features that I feel I need to learn to be able to include into my final major project to enhance my knowledge, understanding and overall gameplay experience in my horror puzzle game. Also, throughout this report I will be conducting primary research, looking into similar narratives and real life examples that have inspired my horror puzzle game, and the similar narratives will allow me to analyse how the production company, director or writer managed to portray a theme that I wish to include in my final project.
Theories and Techniques
Planning Technique 1 - Level Planning / Game Design Planning
To effectively, efficiently and successfully design and develop a game one must fully plan out their game concept, to ensure that the final product is well defined. One way of ensuring that a game concept is well planned and the levels of the game are considered before production begins is to create a series of level design blueprints, these level design blueprints feature the level map, any mechanics that are featured and how the player interacts or moves around the map level. I have previously worked with level design blueprints but as I am creating an open world game that will feature many enterable buildings and levels I must research how to efficiently use these documents for a larger project such as this. One great method is to break down the mechanics and features in the game concept into three categories, the most prominent, then what happens as a result of this and then the larger events that happen throughout the gameplay, P. Bottomley (2011) says “create a list of your core mechanics. This, for most genres of games, will include jumping, running, walking. [...] then create a list of secondary mechanics, these are things that may be specific to your level, say you have an underwater section where the player is pulling triggers, that would be included here. And thirdly, you include Events.”. As Bottomley says here the most effective way of ensuring that a concept is planned well is to break down the core gameplay mechanics and filter them by ‘importance’ or category. This as Bottomley (2011) has said allows for “Pace” and this pace allows for a well scripted and flowing game that will continue to impress players as the story progresses.
In addition to this, the list of mechanics can then be represented on a visual chart that displays how and when a core mechanic is used, then what secondary mechanic is used and finally what event is triggered. “You need to walk through your level in your head thinking about what the player is going to be doing in the different areas of your level. This is more of a visual tool. [...] Adding a time scale value for how long you think each section is going to take is a good indicator for how many minutes of gameplay your level will consist of.” (Bottomley, 2011), this planning tool for level design is excellent and very beneficial for my project because it allows me to plan the flow of the concept by identifying the mechanics I intend to include and how they are used and effect the gameplay experience. Overall, this is a great method and will be extremely useful for a game like mine that will include an array of different mechanics and events that will unfold throughout the game.
However, another source that I found suggests following a completely different planning model. This model consists of a set of statements that can be used to answer important questions such as what is the theme of the game? and how is the character controlled?. They suggest using a GDD or Game Design Document. I previously researched this document in the process research report and found it “to be a great document that can really help the team stay on task by outlining the progression stages of the [planning] cycle.” (Williams, 2024), the consistent layout of a Game Design Document allows for a well planned roadmap that will include almost everything that will need to be included in the video game for example UI design, User Experience, story, characters and a whole lot more. Acad Or and Game Developer (2010) says “A video game roadmap, known as a ‘game design document’, gives a good idea of how the game's production should go. It answers questions like, ‘Who wants to play this game?’ ”.
Analysing this I can see that a Game Design Document is also excellent at planning every aspect of the game and this document will be extremely helpful for an extremely large project such as mine, however they then go on to say that a Game Design Document is normally “between 50 and several hundred pages” (Acad Or and Game Developer, 2010), this is an extremely large amount of planning and I believe that although this is an industry standard document I do not think that creating a document of this size will be beneficial for my project at this time because of the short deadlines that I have throughout each stage of the project and so I believe that following Pete’s method of flow and pace planning will be greatly helpful instead, because it allows me to plan levels, mechanics and features whilst also allowing me to plan out how long each level will last and what happens as a result of the player activating a mechanic or object in the levels.
Planning Technique 2 - Scheduling / Time Management
I feel that to be able to manage my time effectively I need to fully understand the basics and advice on scheduling and time management. This scheduling will allow me to use my time efficiently and will ensure that my work is spread over my time frame to allow for a managed workflow. Project scheduling and time management can incorporate many different methods and the four most common methods of project scheduling are the following, “Critical Path Method, Program Evaluation and Review Technique, Fast-tracking and crashing, and Gantt charts.”, (Moore, 2023). Each method of scheduling entails different uses, a PERT chart or Program Evaluation and Review Technique allows me to schedule each sub steps in the project and identify what sub tasks of the project are reliant on each other, this is called the “critical path” (Moore, 2023), the critical path is the main focus of the project but the tasks not on the critical path are carried out alongside the main tasks to ensure that the deadline is met. Overall, this technique of using a PERT chart is excellent at setting out a clear precise path that must be followed in a set order to ensure dependencies are met, Moore (2023) says “PERT charts offer a visual representation of the major activities (and dependencies) in a project. The activities are displayed sequentially (like a project roadmap)”.
I believe that this method is excellent at planning my time and ensuring that I have set out all of my tasks before moving onto the next phase of the project development. However, Moore then moves on to talk about Gantt charts, Gantt charts are a great tool to plan out all of the tasks in a flowing method and a time frame is also set on the tasks across the time frame of the phase in the cycle, to manage the scheduling of the project. I have previously worked with Gantt charts and I believe that they are great at giving a visual representation of the tasks in the project and they can allow for a greater workflow, Moore (2023) says “Gantt charts offer a graphical representation of your project timeline from start to finish. Using a Gantt chart can increase workflow transparency”. As we can see here they believe that Gantt charts give an excellent graphical roadmap of the project, just like I identified through using this method previously, and the project can be scheduled over the timeframe to allow for efficient workflow. A Gantt chart will be excellent for my horror game project because of the many subtasks that I will need to complete to reach the final outcome, these subtasks will consist of the many mechanics that I will need to include such as puzzles and combat.
In addition to this, Indiana University (1980), says “The most common scheduling format is the Gantt Chart or project chart. The chart usually has milestones or check points indicated on it. This is an excellent way to represent schedules for non- complex projects or as an overview”. Just like Moore, this report by Indiana University also agrees and emphasises that a Gantt Chart method of scheduling and project management is a very common method that is an excellent tool at visualising each stage of the project. By going from this, I can see that a Gantt Chart is possibly the best method of time management that will be best suited towards the fast paced project that is my horror puzzle game. Both sources say that this method of planning and management is excellent for managing time and creating an effective workflow, in comparison to the PERT chart method of management mentioned by Moore, the Gantt Chart will allow for all of the key items to be displayed such as timeframe and the tasks needed to be completed.
However, the Gantt chart has one drawback from the PERT Chart and that is the critical path is not explicitly identified, although this is not a big deal it will mean that I will only be focused on one task at a time instead of working on the critical path alongside the sub float tasks. “It is limited in that it does not show clearly the sequential interrelationships or constraints that are involved in the actual implementation of the project” (Indiana University, 1980). This means that my main focus will be on one task at a time possibly negatively impacting my workflow and ethic, this may increase the quality of my work as I will only be focusing on one mechanic or element at a time, but I may run out of time for the deadline because tasks will be completed one after the other.
After analysing this further, I have come to the conclusion that I will use a combination of the two methods of scheduling, so I will use a Gantt chart alongside a PERT chart to correctly identify the critical path of the project, because the path will allow me to stack the major tasks alongside the float tasks, “Both Gantt charts and the critical path method serve as indispensable tools for project management. They both help you track a project’s progress and manage the associated tasks to stay on time” (Ramos, 2020). Ramos also states that using the two methods intertwined will allow for a greater workflow whilst also ensuring the project progress is fully identified and the tasks stick to the set out time scale. Overall, these two methods will be greatly beneficial for the management of my horror puzzle game project and I will take the advice on board by creating these two documents when it comes time to start the planning stages.
Practical Technique 1 - Lighting Effects In Construct 3
When it comes to my horror themed puzzle game, atmosphere will be key to creating an eerie and immersive experience, I can achieve this by implementing different lighting behaviours to my game. As I have never experimented with a mechanic such as this, research into this area will be greatly beneficial when it comes to understanding how to effectively use the feature. After extensive searching for sources explaining how to add this feature, I managed to find two detailed tutorials that explain clearly what features to use and what knowledge I will need to be able to execute such a mechanic. The first source was from an online journal, this journal consists of a well written entry that explains the mechanic very well and I was able to pick up that a lighting mechanic is very simple to implement one you know how to do it, a lighting effect will add a sense of depth to the gameplay experience, “This lighting effect allows you to give more of a feel of the player being in a dark place, but allowing them to see for a certain distance around the player or around the objects when spaced at certain distances.” (Bailey, 2018).
Reviewing this source, Bailey explains that I will need to add a sprite that shows a fading colour gradient, so the strength of the colour fades out from the middle, and then I need to add a new layer and add this sprite to it. After this I need to change the background colour of the layer to black and set the transparency to 0, this will allow for no assets on the level to be seen. Then I will need to add a ‘Multiply’ effect to the light sprite and attach this to the player using a line of code, ‘Everytick Light Set Position to Player’ and when I run the game, the light effect should follow the movement of the player. Analysing this, I can see that this is a very well broken down method that is simple and effective at adding this feature to enhance the feel and ambience of the game whilst highlighting the tone and mood of horror. This will be extremely beneficial for my horror themed puzzle game as I want to maintain the dark tone whilst creating a detailed atmosphere.
The second source I researched and analysed was a YouTube video by Xanderwood, this video uses the same principles as the online journal except this method of implementing the light effect can be used across the whole of the game instead of only being available on a select level, this will be greatly beneficial because I will be able to leave the effect on instead of creating separate event sheets for different levels, this will keep my code simple and easy to follow, as I will be using one sheet instead of multiple per puzzle. This will also help to resolve issues within the code because I will not have to check every event sheet instead I can just go to the one sheet and resolve it from there. In addition to this, this method creates a really effective and realistic bloom pulsing effect on the light sources and will fit perfectly with my horror theme and will allow me to enhance the horror experience. This method is also simple and concise and also relies on the programmer attaching the light source to the player, “I’m also going to attach one to the player so that when we walk into the darkness our player lights up” (Xanderwood, 2021). By attaching the light to certain objects and sprites we are able to easily implement copies of the sprites around the levels and all of them will emit a light bloom effect.
In continuation, this method is also extremely useful when switching from puzzle to open world and then back to another puzzle, because the light effect will only display when the player character is within a dark space, so the light bloom effect will toggle off when they move to a non dark area. This is greatly beneficial because I will be able to keep the light effect on at all times but it will not render unless the ‘light layer’ is selected, unlike Bailey’s method that does not allow for this feature. Overall, I feel that Xanderwood’s tutorial explained and showcased the feature better than Bailey’s because of the realistic pulsating bloom effect and the ability to carry the light effect throughout the array of different puzzles and levels that will be present in my horror puzzle game, so I will adopt a lot of the theory around Xanderwood’s method. However, to stick with a horror theme for my game, I will use one element of Bailey’s method and this is to set the background of the layer to 0 transparency and also a solid black colour, this will allow me to create a dark atmosphere and will also ensure that the horror theme is emphasised.
Practical Technique 2 - Inventory System
To make my concept as ambitious as possible I have decided to add many new mechanics to my concept. One of these proposed mechanics is to add a functioning inventory system so the player can pick-up and select interactive items such as keys that can then be used to unlock different puzzles and areas around the map. I believe an inventory system will be greatly beneficial for my horror puzzle game because the player will need to interact with many items such as keys, crowbars and lock picks and select them at the appropriate time to complete puzzles, I believe one effective way to execute this is to use global variables or Booleans that trigger as the player interacts with an item. Construct and Laura_D (2020) says “In this project, the inventory is split into several different categories (stored in arrays) to allow the player to store different kinds of items. When the player is highlighting a particular item, its details are displayed using information stored in a JSON file.”, this method of adding an inventory seems to be simple to understand and incorporates, as I said, many Booleans and Variables that are triggered as the player interacts with items, this seems to be the easiest and most efficient way of implementing an inventory system. The forum post also highlights a .C3P file or Construct 3 file, this file has allowed me to view all of the code needed for the inventory system to function.
By analysing the code, I have gathered an understanding of how the system functions, it works by comparing the ‘Family’ inventory with the assets available on screen and the functions that fire when a certain button is pressed on the keyboard to view the inventory UI. In addition to this, this method will require me to work with an array of new features in Construct 3 allowing me to expand my knowledge, for example, I will have to work with Arrays, AJAX Function, InvData, ItemData and ItemNumbers functions. These new features will allow me to expand my knowledge and will stretch this further. I believe this method is great and the GUI is excellent, but I feel it is too large for an inventory system so this will have to be resolved when I move into the experimentation phase.
Another method of implementing an inventory system suggests using similar methods to that of the previous method but instead this is scaled back and the inventory UI can only be interacted with, with a mouse instead of keyboard, this is not too big of a problem but I feel that the interactivity through the keyboard greatly outweighs the benefits of the mouse interactivity. In addition to this, this method works by using many variables that trigger when sprites are clicked and then local parameters are used to add the item too and from the inventory system. Winstreak! (2022) states “We’ll compare variables [and] set Boolean[s]”, this expands upon the point I made that this video tutorial method uses a lot of local variables and Booleans that are used to create a simple functioning inventory system.
Comparing this method of adding an inventory system to that of Laura_D’s method, this tutorial really falls short especially when it comes to interactivity and usability, as the GUI feels blocky and lifeless and it can only be interacted with using the mouse cursor, which would mean the player would have to switch from keyboard to mouse frequently, which would spoil the experience of my horror puzzle game. Overall, Laura_D’s method in my opinion feels a lot more rounded and polished and I believe that this method of inventory system would fit perfectly with my puzzle game as the player will only be needing to pick-up a small amount of items per puzzle, moving forward I think that I would definitely opt for Laura_D’s method when I move to experimentation simply because of the feel and interactivity of the system.
Practical Technique 3 - Shadows and Water Reflections
As I have stated before, the purpose of this Final Major Project is to showcase all of my previous learning and also expand and stretch my knowledge further to create a well rounded, polished final outcome. One way of achieving this, is to implement and experiment with new mechanics, one of these new mechanics that I want to add to my game is shadows / water reflections, up until now all of my previous games have felt very lifeless, and a simple way of resolving this is to add shadows and water reflections. I have never worked with shadows or reflections of this type so extended research into this area is extremely important to building my understanding of the feature and ultimately this information that I have gathered will be important when it comes to the experimentation phase of the project.
By looking at reflections and how shadows work in real life, I would say that a simple method of creating shadows and reflections would be to clone all of the objects on the canvas and invert / mirror them and also add a sprite with a lower transparency. By going from this, I found a Construct 3 Community forum post that essentially uses the same method that I just talked through, the post highlights to, “Make a clone of the background image and flip it upside down and add the Warp Ripple effect to the water image.” (Construct and Lamar, 2017). This follows the same idea that I had except the forum explains that to achieve a realistic water effect on my reflections, I must use a new behavioural effect called “WarpRipple” (Construct and Lamar, 2017), this effect is a new feature to me and by going from the images provided on the forum I can see that the reflections are extremely realistic in terms of water ripple and movement. To be able to reflect sprites and other interactive objects such as the player, Lamar explains that I must go through the same steps as creating clones of the sprites, flipping them and adding a Warp Ripple effect to the cloned sprites. The only difference that Construct and Lamar (2017) stated is that they “created a clone sprite of the character and pinned it to the player”, this will be extremely important to remember because the player or objects will not be able to reflect correctly if they were to move around the canvas. Overall, this method seems to be pretty easy to understand and I believe that these reflections could come in handy when designing my puzzles for my horror game because I could possibly use reflections in the puzzles to hide key objects.
(Lamar, 2017)
In comparison, this second method of implementing shadows, water effects and reflections allow for a greater dynamic and streamlined experience because instead of flipping all of the sprites and adding the effect individually to each like the previous method, this method uses several lines of code so if I was to add an extra tree or lamppost to my game the code would pick this up and automatically spawn a reflection of it. Game Design With Reilly (2023) says, “This is very much dynamic so if I add in more objects [...] this will automatically put in the new reflections for me”, this will greatly reduce the amount of time that I spend working on implementing reflections and will ultimately streamline the workflow because their will be no human errors when working out how to code and position the reflected sprites. Overall, this is already a better method than the previous one because I will be able to simply add in all of my reflections such as lampposts and other environmental objects such as litter and characters, this will be excellent at creating an eerie and dark atmosphere that I am aiming to adopt in my horror puzzle game. This method also works in a similar way to the previous one by Lamar because you have to clone the objects and save them as a reflection sprite, then you have to add in a new layer and add the water ripple effect to the layer instead of the background so all of the objects spawned on that layer adopt the water effect and then code in so that the objects near the water spawn the reflection sprites on the water layer.
The only key difference to this is and the previous method is that this method allows me to add the water effect to the layer, this in turn improves the efficiency of the game by decreasing the likelihood of human miscalculation, “The first thing that we need to do is create a new sprite and this will be on a layer called water reflections and the reflections do need their own layer” (Game Design with Reilly, 2023). As I have said previously, the method presented here is ultimately a more polished and efficient way of implementing a water and reflections feature and this will reduce the time that I spend working on small features like this and will increase the amount of time that I have available to work on the larger and more prominent mechanics and themes that I will be needing in my horror puzzle game.
In conclusion, I feel that although Lamar’s method of adding water effects and reflections seems to be easy to understand and would produce high-quality shadows and water effects, but I feel that Game Design With Reilly’s method is more intuitive, polished and makes the game world feel more alive by adding extra little details to the water effects and the reflections to create a realistic and detailed world. So moving forward I will be adopting the method presented by Game Design with Reilly because I feel that their method will allow me more time to work on the larger mechanics and features within my horror puzzle game, whilst creating a detailed and rich atmosphere that I feel I want to portray in my puzzle game, and also, this method will allow me to move and add more objects as I please without the need to code in the reflections individually like Lamar’s method.
Practical Technique 4 - Pixel Art Shading Techniques
To be able to expand and improve my knowledge I feel that I must research different pixel art shading techniques because I feel that overall my skills are lacking within art design compared to all of the other areas throughout the game development cycle. One method of shading that I researched to ensure that I can capture the depth within my pixel art was dithering, dithering involves using a two colour palette and alternating between the two to give the illusion of blending and shading when viewing the pixel art at a far distance, “Dithering involves alternating between two colours to create a gradient-like effect, and it’s often used to create soft shading effects” (Saitam, 2023). This explained method of dithering shows how only two colours may be necessary to add detail, depth and texture to an object, so I may consider choosing this simple method of dithering when it comes to smaller sprites within my horror game.
Another source has also said that dithering is great for adding texture and detail to an object through a limited palette, “Reasons I might use dithering [...] limited palette, added texture” (u/ ke2uke, 2020), this shows me that dithering is a very popular method of shading and I may want to consider using this popular method throughout my pixel art. In addition to this, a professional pixel artist, Fatbearddraws (2024) says, “Dithering [...] you use alternating pixels so that when you look at the artwork in the macro scale it tricks your eyes that it is shaded [...] without using a third colour” and Sanjeetha - Pixelartist (2024) also agrees with this by saying “Sometimes dithering also appears as shading. For textures mainly dithering is important”. These ultimately highlight that dithering is a professional and very common method when it comes to shading in pixel art and therefore, I must adopt this method of shading for my smaller assets within my horror puzzle game, as it has been presented by these sources that dithering works best when it is applied to smaller assets.
The second shading technique that I wanted to research into was hue shifting, hue shifting works in a very similar way to normal pixel art shading except the colour palette is stretched, augmented and exaggerated extremely, when moving to the lighter sides of the art colours become more saturated, then the darker sides adopt a very dark colour palette such as black or purple. I have found that this method works best on larger assets where lighting can be more exaggerated and present, this may work best when it comes to my larger buildings in my horror puzzle game. Fatbearddraws (2024) says, “Hue shifting [...]. This is more suitable to game art and probably better for you. For the same lemon, the most direct light source you can draw in extremely light yellow, or white [...] For the shadowy part, you can pick a more orangey yellow, orangey red, and purple if you want. This makes the lemon more interesting”. This detailed breakdown of hue shifting shows the complex method that I would have to go through to be able to effectively pull this off, this method seems to be a better method at creating detailed art that showcases depth and detail, and I believe that this would be an excellent method to adopt for my puzzle horror game as I want to create a dark and detailed atmosphere to emphasise the horror theming.
However, another professional pixel artist recommended to me by Fatbearddraws has a different outlook on this method of shading and they believe that I should not overdo it with the depth and detail to my art textures and they also recommend that I stick to a set colour palette, “I like to make a color palette, this can be a big help to keep somewhat consistent style, and can help you to set up an atmosphere” (Michaela Olivová, 2024), this somewhat links to what the previous source said by using a consistent palette throughout the design of the assets, when it comes to my horror game I will want to adopt a dark colour palette to ensure that I portray a dark atmosphere. Michaela Olivová (2024), then goes on to say “For shading, [...] I wouldn’t overdo it with too much detail and keep it more simple [...], I think it’s best to have your game readable”, Michaela is explaining to me that shading is not the be all and end all when it comes to pixel art in a game and they recommend that stick to a more simple approach to detail and shading, and therefore focus more on ensuring that my game is playable and readable instead of creating an overly detailed atmosphere because often a less shaded atmosphere tends to be more detailed.
Comparing both sources, I found that although Michaela’s approach to a less detailed and shaded approach would work in most cases when it comes to game design, I feel that I would not be able to portray my theme accurately and therefore I have decided to stick with Fatbearddraws approach when it comes to hue shifting because I will be able to create more depth within my horror game and this will allow me to expand my pixel art knowledge further than the other less detailed approach. Moving forward, I will also adopt the advice from Michaela where they advised me to look at reference images to ensure that I capture textures accurately.
Similar Narratives
For the similar narratives section of this report I wanted to take a look at an array of different professional media products that link with the theming of my horror themed puzzle game, to analyse how they execute the theme and how I will interpret this and rework it so I can incorporate this into my top down horror puzzle game. I will be analysing how the product interprets the theme and how they work with mechanics and features such as walking, running and narrative. I have play tested an array of video games across multiple console platforms and also watched various horror themed movies to gather this research.
GTA - DMA Design 1997
The first video game that I wanted to analyse and research was Grand Theft Auto (DMA Design, 1997), GTA includes a top down perspective whilst focusing on mission based objectives and a pixel art style, this greatly influenced my concept because I have planned on using a top down perspective, pixel art style and also mission objectives, except my mission objectives will be multiple strategic puzzles. GTA uses a simple movement system that is intuitive and responsive, this allows for sharp movement and quick reactions to the players movement and allows for a fast paced user experience. The main objective of the game is to complete an array of missions in the quickest amount of time to score as many points as possible, also, a secondary objective is to steal cars and explore the open world.
Perry (2018) says, “Gamers take on the role of a low-level gangster, who’s helping out the mob boss with minor tasks of thievery”, this will be closely similar to my concept as the player will be playing as a character who will be completing puzzles and tasks for various NPC characters. Overall, I have drawn inspiration from GTA in many aspects such as the art style, top down perspective, open world, missions and the sharp character movement.
Resident Evil 2 - Capcom 2019 and Resident Evil 4 - Capcom 2023
The next video games that I drew inspiration from and also analysed in this research report were Resident Evil 2 (Capcom, 2019) and Resident Evil 4 (Capcom, 2023), Resident Evil 2 is a remake of the original Capcom game published in 1998 and the game is survival horror focused, whilst also touching on other genres such as puzzles, shooter and adventure. Overall, Resident Evil 2 and 4 are a dark and gloomy game that takes place in a series of locations but most prominently a city, police station and an underground research facility in RE2 and a small remote town, castle, stronghold island and another research facility in RE4. The games use the horror theme excellently and they do this by introducing jump scares, a plethora of enemy types, a scary, eerie and dark atmosphere, and also by adding various pre-programmed dilemmas that can occur to enhance the horror experience. Stobbart (2019) says, “Many games make use of the conventions of horror - jump scares, for example, can be found across the medium” Overall, I feel that the Resident Evil series are a brilliant collection of games that I believe focuses on an excellent game design and sound design that truly emphasises the horror atmosphere and fully immerses the player within the horror worlds, the player feels a deep connection to the stories that unfold throughout and this in turn enhances the player experience. When it comes to my horror puzzle game, I must ensure that I find a balance between game design and sound design so that the player feels immersed and the game world is enjoyable and incorporates the puzzle genre well like the Resident Evil series.
Shaun Of The Dead - Universal Pictures 2004 and Zombie Land - Columbia Pictures 2009
In this research I also wanted to analyse at least one movie that adopts the horror genre, I went for Shaun Of The Dead (Universal Pictures, 2004) because it was a key inspiration for the enemy types that I want to adopt for my horror puzzle game and that was Zombies. Zombies play a very important role in Shaun Of The Dead and I wanted to analyse how they walk and move throughout the movie, notably there is a mix of different movements for these zombies but for the most part the majority of zombies are slow and very jolty with their movements. So I want to adopt a similar movement style to that to truly capture the essence and lifeness of these enemies. Another similar movie is ZombieLand (Columbia Pictures, 2009), ZombieLand also includes an array of zombies all of which adopt different movement speeds and types, just like Shaun Of The Dead. This movie also tries to create a comedic outlook on life just like Shaun Of The Dead, however I will not be adopting this in my game as I want to create a dark, eerie and scary atmosphere. Overall, both movies use a wide range of general horror conventions such as jump scares, zombies, survival and an exaggerated post apocalyptic setting. When it comes to my horror game I will need to consider all of the conventions mentioned and used throughout these sources to ensure that my game does in fact meet the theme and genre of horror.
Many Horror movies tend to opt for a more comedic mood and try to not lean towards a more serious focus on horror or survival, just like Shaun Of The Dead and ZombieLand. Mood plays a very large role in the theme of horror and also emotion can play on how a viewer or player can feel when playing through a game or viewing a movie, moods are often longer lasting than emotions through media and are often consistent background states of mind, Sauchelli (2014) theories this in their journal, “My theory of horror relies on moods, which are mental states that differ from other emotional or affective states in certain important ways”. This showcases how emotions are extremely important when it comes to the genre of horror and I believe that I must find a balance of emotion and mood when it comes to planning and production of my horror puzzle game, this also shows that Shaun Of The Dead and ZombieLand goes through a rollercoaster of emotions to portray the emotional states that a person would go through when they encounter a zombie apocalypse.
In conclusion, it is extremely important that I consider emotions and moods in my horror game because they play a key mental and psychological effect on the players experience as they journey through the plethora of puzzles and jump scares that I intend to include in my horror puzzle game.
Real Life
Architecture and City Layouts-
When it comes to analysing the real world and features that I want to replicate or take inspiration from for my horror themed puzzle game, one notable area that I wanted to draw inspiration from and research into was the layout and architectural design in cities. To be able to successfully analyse and research about cities and their architecture I took a trip to London to gather some primary information that will definitely be of key importance in aiding the design choices that I make for my video game world that will be set within a post apocalyptic city. The first area I wanted to look at was architecture, London is made up of a mix of pre war, post war and modern architecture, “From the remains of Roman buildings to the latest developments in modern design, the City is home to a fascinating mix of architectural styles” (© City of London Corporation, 2024), and this is definitely something that I want to add to my game as it shows the world was lived in before the apocalypse and it was also involve me creating an array of different designed buildings and environmental assets. Understanding the different designs of buildings would be a very lengthy process but thanks to my primary research I was able to gather a wide range of images of different building styles and these will significantly help me when it comes to replicating their design and feel in my horror puzzle game.
Another city that I had gathered inspiration and primary research on was New York City, after visiting New York twice over the past year I have been able to gather an understanding of the architecture and design that is prominent throughout the city. New York is a relatively new city when compared to London, so there's not a lot of mix between old and new architecture, “In New York, it is possible to find several architectural styles. From the most classical style such as the Colonial and Neo-colonial styles, Neoclassical, Gothic and Beaux-Arts, to more modern styles like Art Nouveau, Art Deco and the International Style.” (Cornali, 2023). Another clear difference between London and New York's layout is that New York is set out in a grid-like structure which makes it easier to navigate the city, however London seems to adopt a less grid-like structure, opting for a maze of connecting roads, paths and alleyways, aerial photographs that I have taken during my two visits to New York will help me to understand the layout of the city further and will ultimately help me when it comes to designing the layout for my post apocalyptic city. When it comes to my city for my horror puzzle game, I will adopt a similar layout style to London because I feel that an eerie atmosphere is given off for a less unplanned structural layout when compared to the grid structure of New York. In addition to this, as my horror game will be set in a post apocalyptic world then the city that is the main setting of the game needs to be relatively old and rundown so a modern style like New York would not work for my game, so using a mix of modern and post war architecture will allow for a more believable setting and will ensure that for a rundown look to the buildings and other environmental assets around the game.
Building Decay-
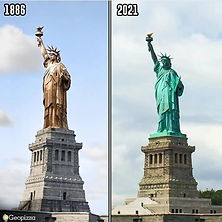
Another area in real life that I want to replicate in my horror game is building decay. Building decay will enhance the post apocalyptic atmosphere and will also showcase how the city setting has been abandoned and left to the elements after the outbreak of the zombie apocalypse. During my trips to London and New York City I analysed how older buildings have become rundown over the years and I analysed how the buildings facades have changed over the years. A great example of this is the Statue Of Liberty, the once unoxidised copper statue has been left uncleaned and open to the environment over the 140 years that it has been on display on Liberty Island, and over the years the bright copper colour has oxidised significantly and now the statue can be viewed with a distinctive green colour. This decay and oxidisation is also present on many of the other buildings on display at London and New York, except many of these buildings are covered in black dust that has been produced through years of emissions and pollution, decay and oxidisation will be a major focus in my horror puzzle game because as the city has been left to rot I want to effectively present this, to add further detail and realism to my horror game.
(Yadon, 2021)
Conclusion
In conclusion, this research report will significantly help me to improve and expand my knowledge in an array of different areas of understanding such as planning, time scheduling and game design. These planning techniques will help me greatly when it comes to the planning stages of my final major project and I will also be able to experiment with these techniques to evaluate the effectiveness of each method so I can choose planning methods that will be efficient in helping with my planning for this project. The practical techniques that I researched and analysed will significantly help me when it comes to the production of my horror puzzle game and it has allowed me to expand my game development knowledge on Construct 3 and I can not wait to experiment and implement these new mechanics and features into my horror game to fully enhance the gameplay experience.
Overall, I feel more confident in carrying out effective planning and production thanks to the vast research that I have carried out and I feel that I have greatly improved in terms of planning methods and these methods such as Gannt charts and PERT Charts will help me when I move into the planning stages. In addition to this, I now have a better understanding of the different pixel art shading techniques thanks to the array of primary research sources that I gathered and I now believe that I am more confident when it comes to pixel art techniques, as before the report I had a basic understanding of pixel art and seen as this is my final project I wanted to expand my knowledge and showcase my progression from before the final major project to the final outcome.
Looking through similar narratives and real life examples gave me a greater insight into how my genre can be portrayed and presented effectively and has aided my design choices when it comes to portraying and showcasing my horror theme. In addition, my real life examples of architecture, city layouts and building decay has given me a better insight into how to effectively portray and reimagine these into my horror game concept, to fully enhance the dark atmosphere and also the post apocalyptic theming.
Bibliography
Primary -
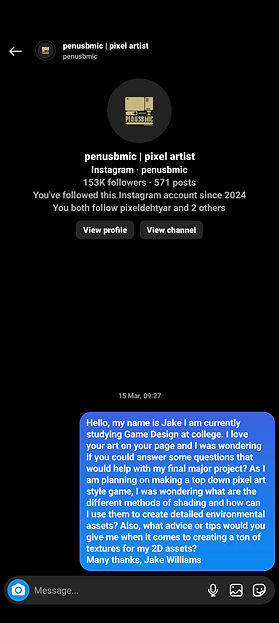
Fatbearddraws (@that.pixel.artistt) (2024:15 March) [Instagram Direct Message]
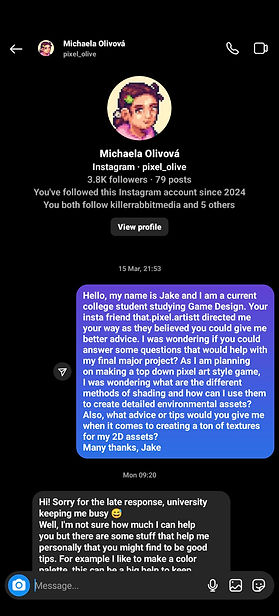
Michaela Olivová (@pixel_olive) (2024:18 March) [Instagram Direct Message]
Sanjeetha - Pixelartist (@sauri1861) (2024:15 March) [Instagram Direct Message]
Secondary -
Acad Or and Game Developer (2010) Game Design planning. https://www.gamedeveloper.com/design/game-design-planning. [Accessed 13th March 2024]
Bailey, R. (2018) 'How to create lighting effect in Construct 2 and 3,' Gamers. Available from: https://vocal.media/gamers/how-to-create-lighting-effect-in-construct-2-and-3 [Accessed March 15th 2024].
Bottomley, P. (2011) The level design document. Available from: https://petebottomley.wordpress.com/the-level-design-document/. [Accessed 13th March 2024]
Capcom. (2019) Resident Evil 2 [Video Game] [Playstation 5]
Capcom. (2023) Resident Evil 4 [Video Game] [Playstation 5]
© City of London Corporation (2024) Architecture. https://www.cityoflondon.gov.uk/things-to-do/architecture [Accessed March 21st 2024].
Columbia Pictures, Sony Pictures Releasing. (2009) ZombieLand [Movie]
Construct and Lamar (2017) 'How to make a water reflection!' Available from: https://www.construct.net/en/tutorials/water-reflection-1253#:~:text=Water%20reflections%20are%20a%20cool,effect%20to%20the%20water%20image. [Accessed March 15th 2024].
Construct and Laura_D (2020) 'Building an RPG-Style inventory.' Available from: https://www.construct.net/en/tutorials/building-rpg-style-inventory-2499 [Accessed March 15th 2024].
Cornali, L. (2023) “New York City Architecture | History & Style,” Study.com, 21 November. Available from: https://study.com/academy/lesson/new-york-city-architecture.html [Accessed March 21st 2024].
DMA Design. (1997) Grand Theft Auto [Video Game] [Playstation] Available from: https://www.rockstargames.com/games/gta
Game Design with Reilly (2023) Water reflections in construct 3 (+Code). Available from: https://www.youtube.com/watch?v=ESFi0B27fVA. [Accessed March 15th 2024].
Indiana University. (1980) ‘Project Management, a Workshop in Planning, Scheduling and Control Techniques,’ Indiana University, Management Sciences Training Center (U.S.), Madden, Madden & Associates. [Accessed March 14th 2024].
ke2uke (u/ke2uke) (2020) “Shading Tips” [Reddit Post]. Available at: https://www.reddit.com/r/PixelArt/comments/hsaatr/shading_tips/?rdt=50706 [Accessed 20th March 2024].
Lamar (2017) Water ripple effect. https://construct-static.com/images/v1195/uploads/articleuploadobject/0/images/17914/warp-ripple.png.
Moore, K. (2023) Project scheduling 101. https://monday.com/blog/project-management/project-scheduling-101/ [Accessed March 14th 2024].
Perry, D. (2018) Grand Theft Auto - IGN. Available from: https://www.ign.com/articles/1998/07/10/grand-theft-auto-5 [Accessed March 15th 2024].
Ramos, D. (2020) 'Everything you need to know about Gantt Charts & the Critical Path Method,' Smartsheet, 11 December. https://www.smartsheet.com/content/gantt-chart-critical-path [Accessed March 14th 2024].
Saitam, A. (2023) Pixel-Art & NFTS: Unlocking Their Power And Potential. 4th edn. https://www.google.co.uk/books/edition/PIXEL_ART_NFTs/BeOtEAAAQBAJ?hl=en&gbpv=1. [Accessed March 20th 2024]
Sauchelli, Andrea. (2014) “HORROR AND MOOD.” American Philosophical Quarterly, vol. 51, no. 1, pp. 39–50. JSTOR. PDF Available from: http://www.jstor.org/stable/24475369 [Accessed March 21st 2024]
Stobbart, D. (2019) Videogames and horror: From Amnesia to Zombies, Run!. University of Wales Press. [Accessed 20th March 2024]
Universal Pictures, Rogue Pictures, Bac Films. (2004) Shaun Of The Dead [Movie]
Williams, J. (2024) Process Research Report - Jake Williams. [Accessed 13th March 2024]
Winstreak! (2022) Dynamic Inventory Setup - Construct 3. Available from: https://www.youtube.com/watch?v=FdhFzrF1UhQ [Accessed March 15th 2024].
Xanderwood (2021) How to ADD LIGHT to your Construct 3 Game - Construct 3 Lighting Tutorial. Available from: https://www.youtube.com/watch?v=8xmcIxgfmCg [Accessed March 15th 2024].
Yadon, D. (2021) 'Image of the oxidisation of The Statue Of Liberty,' Pinterest. https://www.pinterest.co.uk/pin/national-archaeology-on-instagram-a-esttua-da-liberdade-em-nova-york-feita-de-cobre-mas-por-causa-da-oxida--446700856799528970/ [Image: https://i.pinimg.com/originals/9f/f8/db/9ff8dbc9a34083dbb1a1d62f2242bd11.jpg] [Accessed March 21st 2024].
Many of my primary sources did not respond to my emails or Instagram direct messages but I asked a range of questions for each person I contacted so I have varying techniques and advice from the three people that replied to my Instagram Messages. Evidence of me contacting the interviewees can be found below:
 |  |
|---|---|
 |  |
 |  |
 |  |
 |  |
 |  |
 |  |
 |  |
 |  |
 |  |
 |  |
 |  |


 |  |
|---|---|
 | |
 |  |
 |  |
|---|---|
 |  |
 |  |
 |  |
|---|---|
 |