_edited.jpg)
Year 2 IMG
Maya Session 1
During the first week back at college I was asked to 3D model several objects in Maya, a 3D modelling software that I will be using throughout my second year on the course. This piece of software is something new that I have never worked with before and this first session taught me the basics of modelling and allowed me to experiment with the tools and features in the software in order for me to create 4 pieces of furniture. These pieces of furniture ranged in difficulty to model, I started with the easiest of the four, that was a table and then moved on up the list. I had video guidance for both the table and chair but the last two I created without any assistance.
Table


Chair


BookCase


Sideboard


This task involved me using newly acquired knowledge and I ran into some problems whilst trying to 3D model my objects as was to be expected, several of my first attempts seen on the creation videos above had many flaws, for example one of my attempts at creating a side board resulted in a slanted face when I was aiming for a straight flat surface. I think that I ran into this problem because instead of manipulating a full cuboid I tried to extract off of a cuboid plane resulting in geometry becoming stuck inside of the model leading to slanted edges and rounded corners. I managed to overcome these problems by persevering and reflecting back upon the video guides given to me, in the end the problem occurred because I was using the wrong tool, instead of extracting the sides I should have used the bridge tool to create a smooth flat surface, just like I used for the Bookcase.
Overall, I feel that this task was helpful in allowing me to experiment with 3D modelling and has set me in a better position for when it comes to the development of my outcome in which I will be needing to 3D model almost all of my assets. Also, I feel that I am now less likely to make the same mistakes again because I have now had practice with these tools.
Unreal Sessions 1&2
During the first week back at college I was introduced to Unreal Engine 5, this engine is what I will be using for the remainder of the college year as it allows to create 3D experiences in more depth than I was able to last year in Construct 3. During the two sessions I was tasked at creating a player character, adding movement, camera movement and also creating a white boxed environment replicating a scene from a video game or TV show.

The first task that was set was to create a character and assign a camera to the player character, this task was in theory very simple however in practice it was very complicated compared to the work I had carried out last year. Camera movements are not already built into Unreal so after taking notes from the tutor and then replicating said stages in my project I was able to successfully replicate camera movement. I ran into little problems, however one area that I found a problem carrying out was understanding all of the menus and where the required tools that I needed where. I solved this issue by reflecting back upon my notes and this in turn made the implementation of these mechanics smoother. The following tasks were yet again related to character movement and focused on mechanics such as walking, running, jumping and crouching.
As you can see throughout the various videos and images attached, I was able to successfully implement all of the mechanics that I set out to include. the videos document the implementation of the mechanic and also showcase the mechanic in action.
Overall, I feel that these Unreal Engine sessions have been incredibly helpful at allowing me to build up the knowledge of Unreal and also helping me to prepare for this project outcome and also future projects. As you can also see throughout the videos is that I ran into rarely any problems and if I did then I was able to reflect back upon my notes and work on a fix for the problem then and there. I will ensure that I continue to take notes and ultimately reflect back on previous notes to help me when it comes to coding in Unreal Engine.

The next session in Unreal Engine saw me implementing light into the game viewport, this was achieved through adding a 3D model of a torch, that I modelled in session 2 of Maya, and then adding said torch to the character model and then attaching a spotlight to the torch. This task was fairly simple and did not require a lot of coding, however finding the perfect position for the torch on the character model took a bit of figuring out as the torch needs to be visible in the viewport but not floating in mid air, so finding a balance took a little playing about.
Overall, I really enjoyed implementing my 3D modelled torch to my experience in Unreal because I was able to showcase my new skills and also build upon them, as I mentioned little coding was required so it was just a task of exporting my model and ensuring that it was set as the correct blueprint class.
Maya Session 2
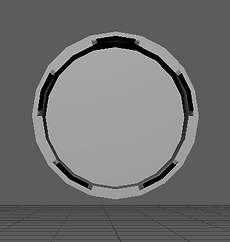
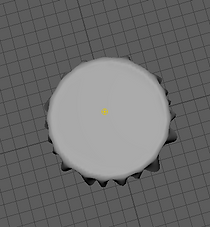
During the second session of Maya I was asked to 3D model several objects as well as applying cloth physics to a tablecloth that I modelled. I started the session by 3D modelling a torch, this torch would be created using a reference image as well as a video guide given to me, I used a reference image because in industry often 3D modellers use reference images from concept artists and do not often have creative freedom, so using a reference helped to build the skills of replicating an image. I found the process of modelling my torch to not be too hard because of the video there to provide help when I needed, however, I did find all of the new tools to be fun to learn and play about with whilst modelling the torch.
Torch

Reference Torch Image


The next piece that I moved onto after modelling the torch was to model a coffee mug, this mug in theory looked relatively easy to model because it would be made up of an extruded cylinder, however, in practice I would say that the mug was the hardest object that I have had to 3D model so far. This is because I had no video guides to help me and also I was having a difficult time trying to figure out how to create a curved mug handle, in the end I was able to find a new tool to create a curved handle with several divisions and segments to create a nice even curve, the only resource that I had at hand was the physical mug to use as a reference.
Mug


After completing the Mug and logging my problem solving I moved onto modelling a circular table and also a table cloth that would in theory curve and fall on the table top just like a real table cloth. For this task I was provided with a short video guide on how to add an ncloth to a polygon plane in order to create realistic physics. This task was extremely fun to carry out and I feel very satisfied with the result, because looking back upon previous 3D models I feel that this is by far the most detailed model that I have created in terms of physics and I am pleased with my first attempt at the ncloth feature. I ran into little problem again thanks to my built up knowledge and also the video guide to help aid me through the new features and tools in order to develop an ncloth.
Table & Tablecloth


Overall, I ran into little problem whilst carrying out the modelling of the three objects, however I did find the mug to be that hardest to model because of the curved mug handle and figuring out how to successfully model it, I have written up a detailed problem solving log on the problem solving page for this issue. I feel that I have now improved on my 3D modelling skills and I feel confident that I will be able to 3D model all of my assets for my Office recreation in Unreal Engine. In addition to this, I am happy with the progress that I have made over the past two weeks surrounding Maya and I cannot wait to move onto modelling my assets for my experience.
Unreal Session 3
During my third and final Unreal Engine session I looked at expanding on my work in sessions 1 and 2 by implementing an inventory system, that allows me to use key binds to equip different items, such as torch, mug and axe. In addition, I coded in a mechanic that allows me to toggle on and off the torch light, making the item more interactive and helping me to prepare for the final outcome. These sessions usually run without any problems and the same was true for this one, I continued to take notes about the content delivery and because of this I was able to reflect upon notes to successfully develop the two mechanics without any fault, this can be seen in my video evidence below.
Inventory System

Torch Toggle On/Off

Overall, I am extremely pleased with my execution of both these mechanics and thanks to my continued note taking I have been able to continue working at a high standard independently, without the need to run into many problems. This will help me greatly when it comes to my independent creation of the Office that I am going to recreate because I will be able to reflect back upon my notes and ensure that my code is correct and it will also help speed up the initial setup of my event blueprint.